User Groups
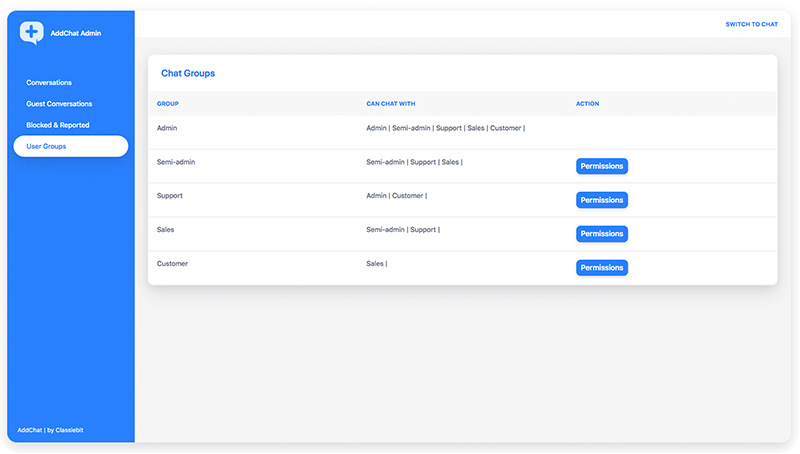
AddChat's one of the most awaited features. AddChat automatically detects the website's User-Groups. Admin can set permissions for the groups from AddChat Admin-panel. Like, which group can chat with which.

{success} AddChat supports multiple user groups e.g a user can belong to multiple groups.
Setup User Groups
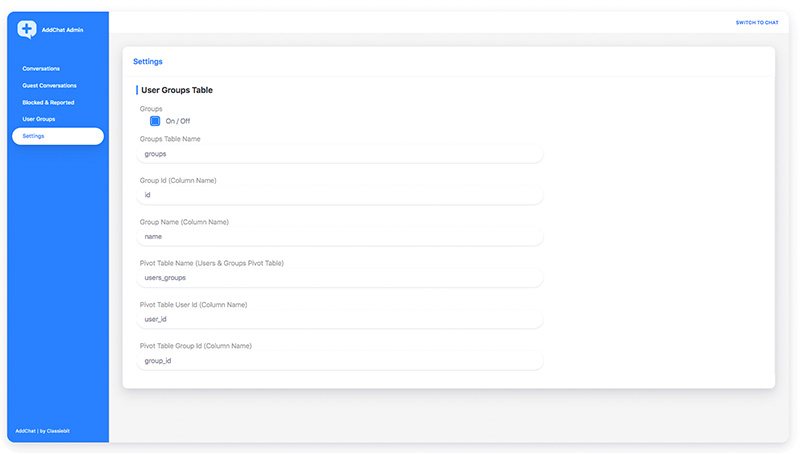
User-groups option is by default disabled. Admin have to enable it from Admin Panel -> Settings. But first, your website must have User-groups functionality.

To enable User-groups option, the website must meet the following requirements.
-
GroupsorRolestable. -
Pivot table for
Users&GroupsorRolestable, which contains sets ofUser IdandGroup IdorRole Id.
{primary} We've developed the Group system according to most common & standard User Groups/Roles functionality.
After completing the above requirements, the Groups can be enabled by following steps-
- Open
Admin Paneland click onSettings - Scroll down to User Groups Table section.
- Click on
Group on/offcheckbox to turnonGroup functionality. - Fill in the following form fields
Groups Table
| Setting Name | Type | Description |
|---|---|---|
| Groups Table | string |
enter Groups table name e.g groups |
| Group Id | string |
enter Group's table Id column name e.g id |
| Group Name | string |
Group's table group name column e.g group_name |
Users & Groups Pivot Table
| Setting Name | Type | Description |
|---|---|---|
| Users & Groups Pivot Table Name | string |
enter name of users & groups pivot table e.g users_groups |
| Pivot table User Id | string |
enter Pivot table User Id column name e.g user_id |
| Pivot table Group Id | string |
enter Pivot table Group Id column name e.g group_id |
{danger} All the above form fields are required to
enableGroup functionality.
{success} After completing all the above steps, click on
Save Settings and logout & login again.
Set Groups Permissions
Once after setting up Groups configuration successfully, you'll see all your website Groups in the Admin Panel -> Chat Groups and there you can set the permissions that which groups can chat with which group.

Follow these baby steps to set group permissions
-
On the
Admin Panel, go toChat Groups -
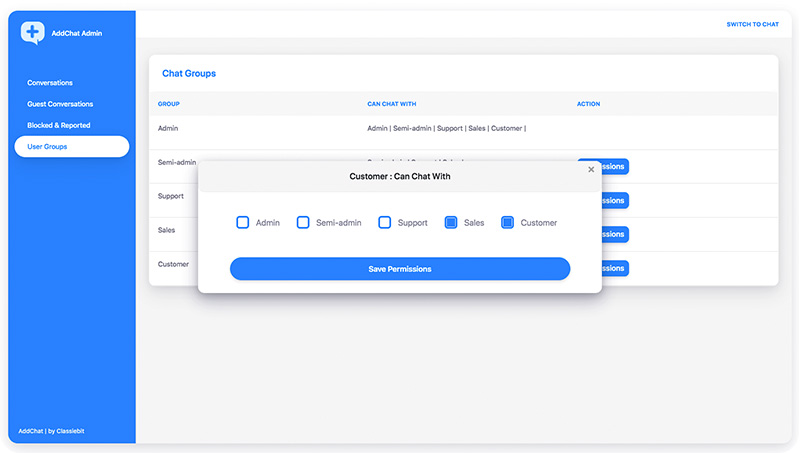
Click on
Permissions on any Group, e.g Members -
A Popup will open, simply check the checkbox with which groups, the e.g Members group can chat.
-
Click on
Save Permissions
{primary} Admin Group users can chat with everyone (zero restrictions).
Groups List
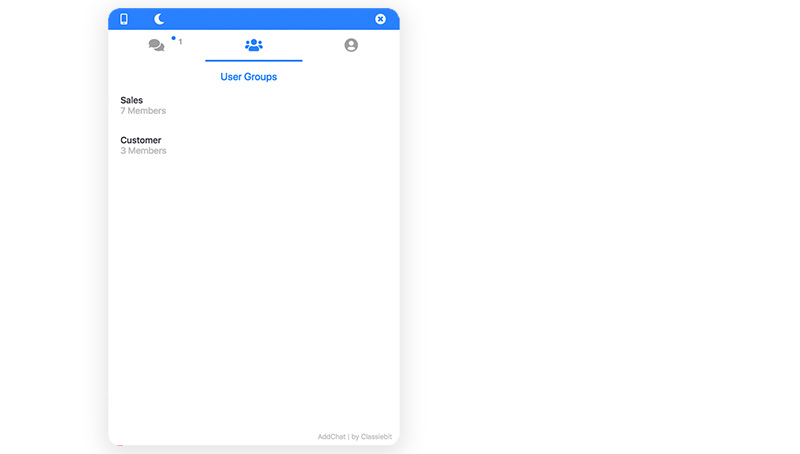
Once everything is done, when the users click on the AddChat widget User Groups tab, they'll see all the Groups according to the Groups Permissions.

And also when the user clicks on each Group, they'll see all the Users in the Group and can chat with them.
{success} This is also useful when a new user joins your website and wants to chat with any other user.